
When I fell ill in 2016 I soon learned the magic of bone broth. After we built our house in 2018, our lack of freezer space made it clear we needed to figure something else out. Canning meat, broth, or soups really used to freak me out. I loved the concept but did not trust the process. I did lots of research before I started, but have found that the USDA guidelines and my user manual for my canner were the most straightforward resources.
If you are going to can animal products, you will need to pressure can them. We have an antique pressure canner that we inherited from George's Grandma and I love it. If you do not have a pressure canner, you can get them at Fleet Farm - lot's of bloggers recommend the All-American pressure canners which you can easily order online.
Canning Bone Broth
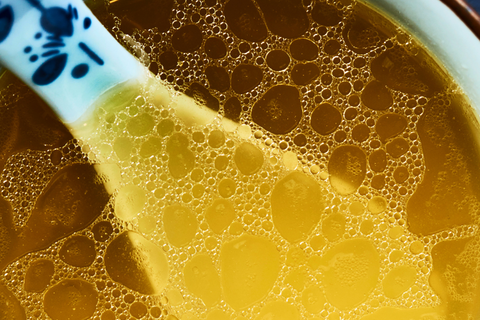
- Start by making your bone broth.
- Clean and inspect your jars - Look for nicks, cracks, and imperfections. I clean my jars in extremely hot water with Dawn Dishsoap, then keep them warm in clean hot water.
- Fill jars until there is 1 1/4" of headspace in the jar. I prefer to wipe the rim with a vinegar soaked paper towel before I put a can top and ring on finger tight.
- Fill your canner with cans and put 2-3" of water in the canner with the cans. (DO NOT COVER the cans with water - water bathing is for veggies/jams/jellies.)
- Follow your manufacturer instructions on venting and pressurizing your canner - My canner has a peacock. Once steam is steadily coming out of the peacock I let is steam (vent) for 10 minutes.
- Once my canner has vented for 10 minutes, I close the peacock and wait for my canner to achieve the correct pressure. See your canner instructions or USDA guidelines for pressure and timing based on jar size and food type.
- Once the canner has achieved pressure, I turn down my stove to stall the canner at the correct temperature - This may take some fiddling around if atmospheric pressure is wonky that day, or if you are trying to can on an electric stove.
- I usually check my canner every 5-10 minutes while the canner is under pressure to make sure it's maintaining a safe level. If I am going to reload the canner again, this is when I start preheating my cans in ultra hot water so the cans don't crack when I put them in the hot canner.
- When the cooking time is up, I shut off my burner then either...
- Carefully open the peacock to let off steam so I can load with my next batch of cans OR
- if it's my last batch of cans, I'll just leave it sit to naturally release as it cools down.
- Take the lid off the canner and pull the cans out using a canning tongs. I place my cans upright on a bath towel on my counter.
- Reload the canner with prewarmed cans, and follow steps 4-10 again.
- Label your cans noting the contents and day that they were processed.
Notes:
- Not all cans will seal on the first try. If your cans to do not seal properly, you can re-process them within 24 hours of the original attempt. Honestly we normally just eat them right away so we don't have to worry about it.
- If you have hard water you may see a white film develop on the outside of your jars after they have been pulled out. This is just hard water deposits. I usually wash mine off the next day when everything is cooled.
- Store cans in a cool, dry, temperature controlled/stable area.
Comments (0)
There are no comments for this article. Be the first one to leave a message!